Installing Linkerd with Helm

6 min read | by Jordi Prats
Linkerd is a service mesh that provides observability, reliability, and security for your Kubernetes applications. We can choose to install Linkerd using helm or it's linkerd CLI tool, which is a more hands-on way of achieving the same.
Since in the linkerd documentations is explicitly recommending to use helm for production environments, we are going to do exactly that.
- Install linkerd CLI
- Linkerd prerequisites
- Install helm repository
- Install linkerd CRDs
- Install linkerd control plane
- Verify the installation
- Installing Linkerd Viz (dashboard)
- Install demo application
Install linkerd CLI
Even if we are going to use helm to install Linkerd, we need to install the linkerd CLI tool to check the installation and interact with the service mesh. There are several ways to install the linkerd CLI, but maybe the easiest way is using brew:
brew install linkerd Linkerd prerequisites
As soon as we have the linkerd CLI installed, we can for the installation prerequisites using:
$ linkerd check --pre Linkerd core checks =================== kubernetes-api -------------- √ can initialize the client √ can query the Kubernetes API kubernetes-version ------------------ √ is running the minimum Kubernetes API version √ is running the minimum kubectl version pre-kubernetes-setup -------------------- √ control plane namespace does not already exist √ can create non-namespaced resources √ can create ServiceAccounts √ can create Services √ can create Deployments √ can create CronJobs √ can create ConfigMaps √ can create Secrets √ can read Secrets √ can read extension-apiserver-authentication configmap √ no clock skew detected linkerd-version --------------- √ can determine the latest version √ cli is up-to-date Status check results are √ Install helm repository
To be able to install Linkerd using helm, we need to add the Linkerd repository to helm. We can choose between the stable (https://helm.linkerd.io/stable) or the edge (https://helm.linkerd.io/edge) repository:
helm repo add linkerd-edge https://helm.linkerd.io/edge helm repo update Install linkerd CRDs
The first step to install Linkerd is to install the Custom Resource Definitions (CRDs). We can install them using a dedicated helm chart:
helm install linkerd-crds linkerd-edge/linkerd-crds -n linkerd --create-namespace Install linkerd control plane
To be able to install the Linkerd control plane, we need to generate some certificates. If you don't have the step tool installed, you can install it using brew:
brew install step Then, we can generate the certificates as follows:
$ step certificate create root.linkerd.cluster.local ca.crt ca.key \ > --profile root-ca --no-password --insecure Your certificate has been saved in ca.crt. Your private key has been saved in ca.key. $ ls ca.crt ca.key $ step certificate create identity.linkerd.cluster.local issuer.crt issuer.key \ > --profile intermediate-ca --not-after 8760h --no-password --insecure \ > --ca ca.crt --ca-key ca.key Your certificate has been saved in issuer.crt. Your private key has been saved in issuer.key. $ ls ca.crt ca.key issuer.crt issuer.key Using these files we can now install the Linkerd control plane:
helm install linkerd-control-plane \ -n linkerd \ --set-file identityTrustAnchorsPEM=ca.crt \ --set-file identity.issuer.tls.crtPEM=issuer.crt \ --set-file identity.issuer.tls.keyPEM=issuer.key \ linkerd-edge/linkerd-control-plane It will take a few seconds to have the control plane up and running:
$ kubectl get pods -n linkerd NAME READY STATUS RESTARTS AGE linkerd-destination-75656bc467-95dd7 4/4 Running 0 69s linkerd-identity-c6f966b5c-b9g5j 2/2 Running 0 69s linkerd-proxy-injector-54c4786c79-89zqg 2/2 Running 0 69s Verify the installation
Once the installation is completed, we can check the status of the installation using the linkerd check command:
$ linkerd check Linkerd core checks =================== kubernetes-api -------------- √ can initialize the client √ can query the Kubernetes API kubernetes-version ------------------ √ is running the minimum Kubernetes API version √ is running the minimum kubectl version linkerd-existence ----------------- √ 'linkerd-config' config map exists √ heartbeat ServiceAccount exist √ control plane replica sets are ready √ no unschedulable pods √ control plane pods are ready linkerd-config -------------- √ control plane Namespace exists √ control plane ClusterRoles exist √ control plane ClusterRoleBindings exist √ control plane ServiceAccounts exist √ control plane CustomResourceDefinitions exist √ control plane MutatingWebhookConfigurations exist √ control plane ValidatingWebhookConfigurations exist linkerd-identity ---------------- √ certificate config is valid √ trust anchors are using supported crypto algorithm √ trust anchors are within their validity period √ trust anchors are valid for at least 60 days √ issuer cert is using supported crypto algorithm √ issuer cert is within its validity period √ issuer cert is valid for at least 60 days √ issuer cert is issued by the trust anchor linkerd-webhooks-and-apisvc-tls ------------------------------- √ proxy-injector webhook has valid cert √ proxy-injector cert is valid for at least 60 days √ sp-validator webhook has valid cert √ sp-validator cert is valid for at least 60 days √ policy-validator webhook has valid cert √ policy-validator cert is valid for at least 60 days linkerd-version --------------- √ can determine the latest version √ cli is up-to-date control-plane-version --------------------- √ can retrieve the control plane version √ control plane is up-to-date √ control plane and cli versions match linkerd-control-plane-proxy --------------------------- √ control plane proxies are healthy √ control plane proxies are up-to-date √ control plane proxies and cli versions match Status check results are √ Installing Linkerd Viz (dashboard)
To be able to visualize the Linkerd metrics, we can install the Linkerd Viz dashboard using helm as well:
helm install linkerd-viz -n linkerd-viz --create-namespace linkerd-edge/linkerd-viz Once installed, we can access it using the linkerd CLI:
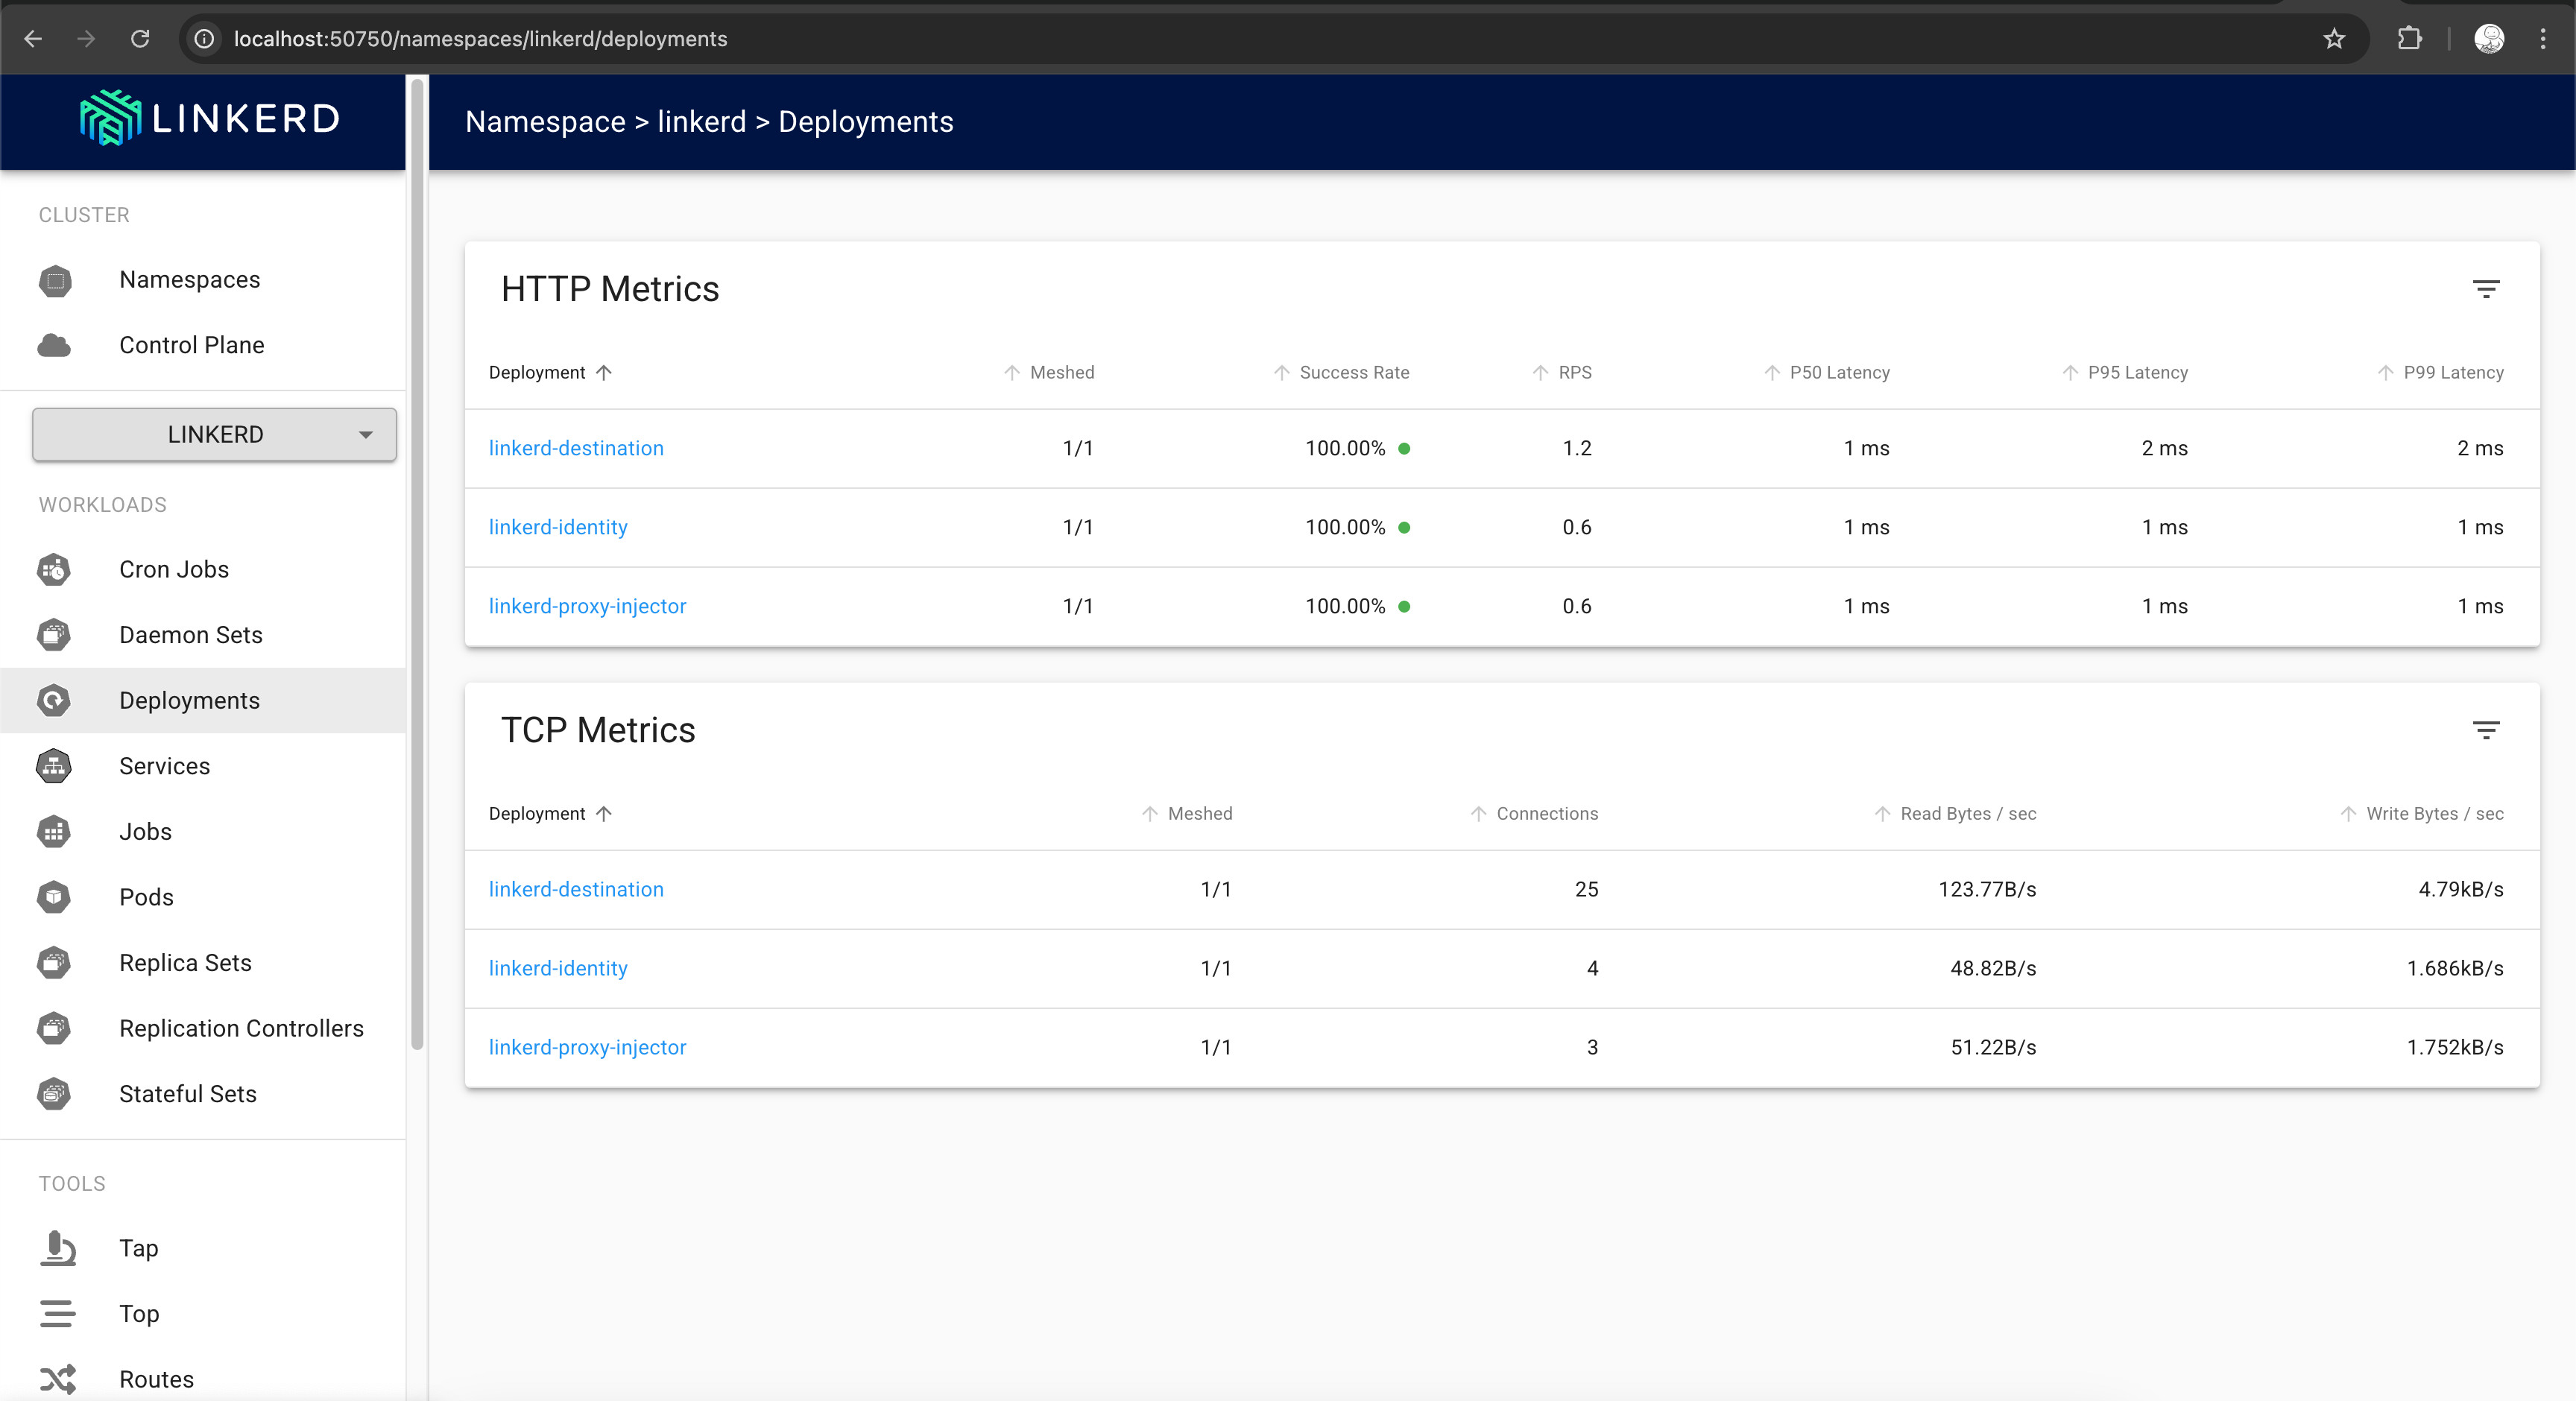
$ linkerd viz dashboard Linkerd dashboard available at: http://localhost:50750 Grafana dashboard available at: http://localhost:50750/grafana Opening Linkerd dashboard in the default browser This will open the Linkerd dashboard in your default browser, or you can access it using the URL provided in the output:
Install demo application
To test the installation, we can install a demo application that will be used to generate some traffic and visualize it in the Linkerd dashboard. To inject the linkerd annotations (linkerd.io/inject=enabled) in the demo application, we can use the linkerd inject command:
k create ns emojivoto curl https://run.linkerd.io/emojivoto.yml | linkerd inject - | kubectl apply -n emojivoto -f - This will create Pods in the emojivoto namespace that we can use to visualize the traffic in the Linkerd dashboard:
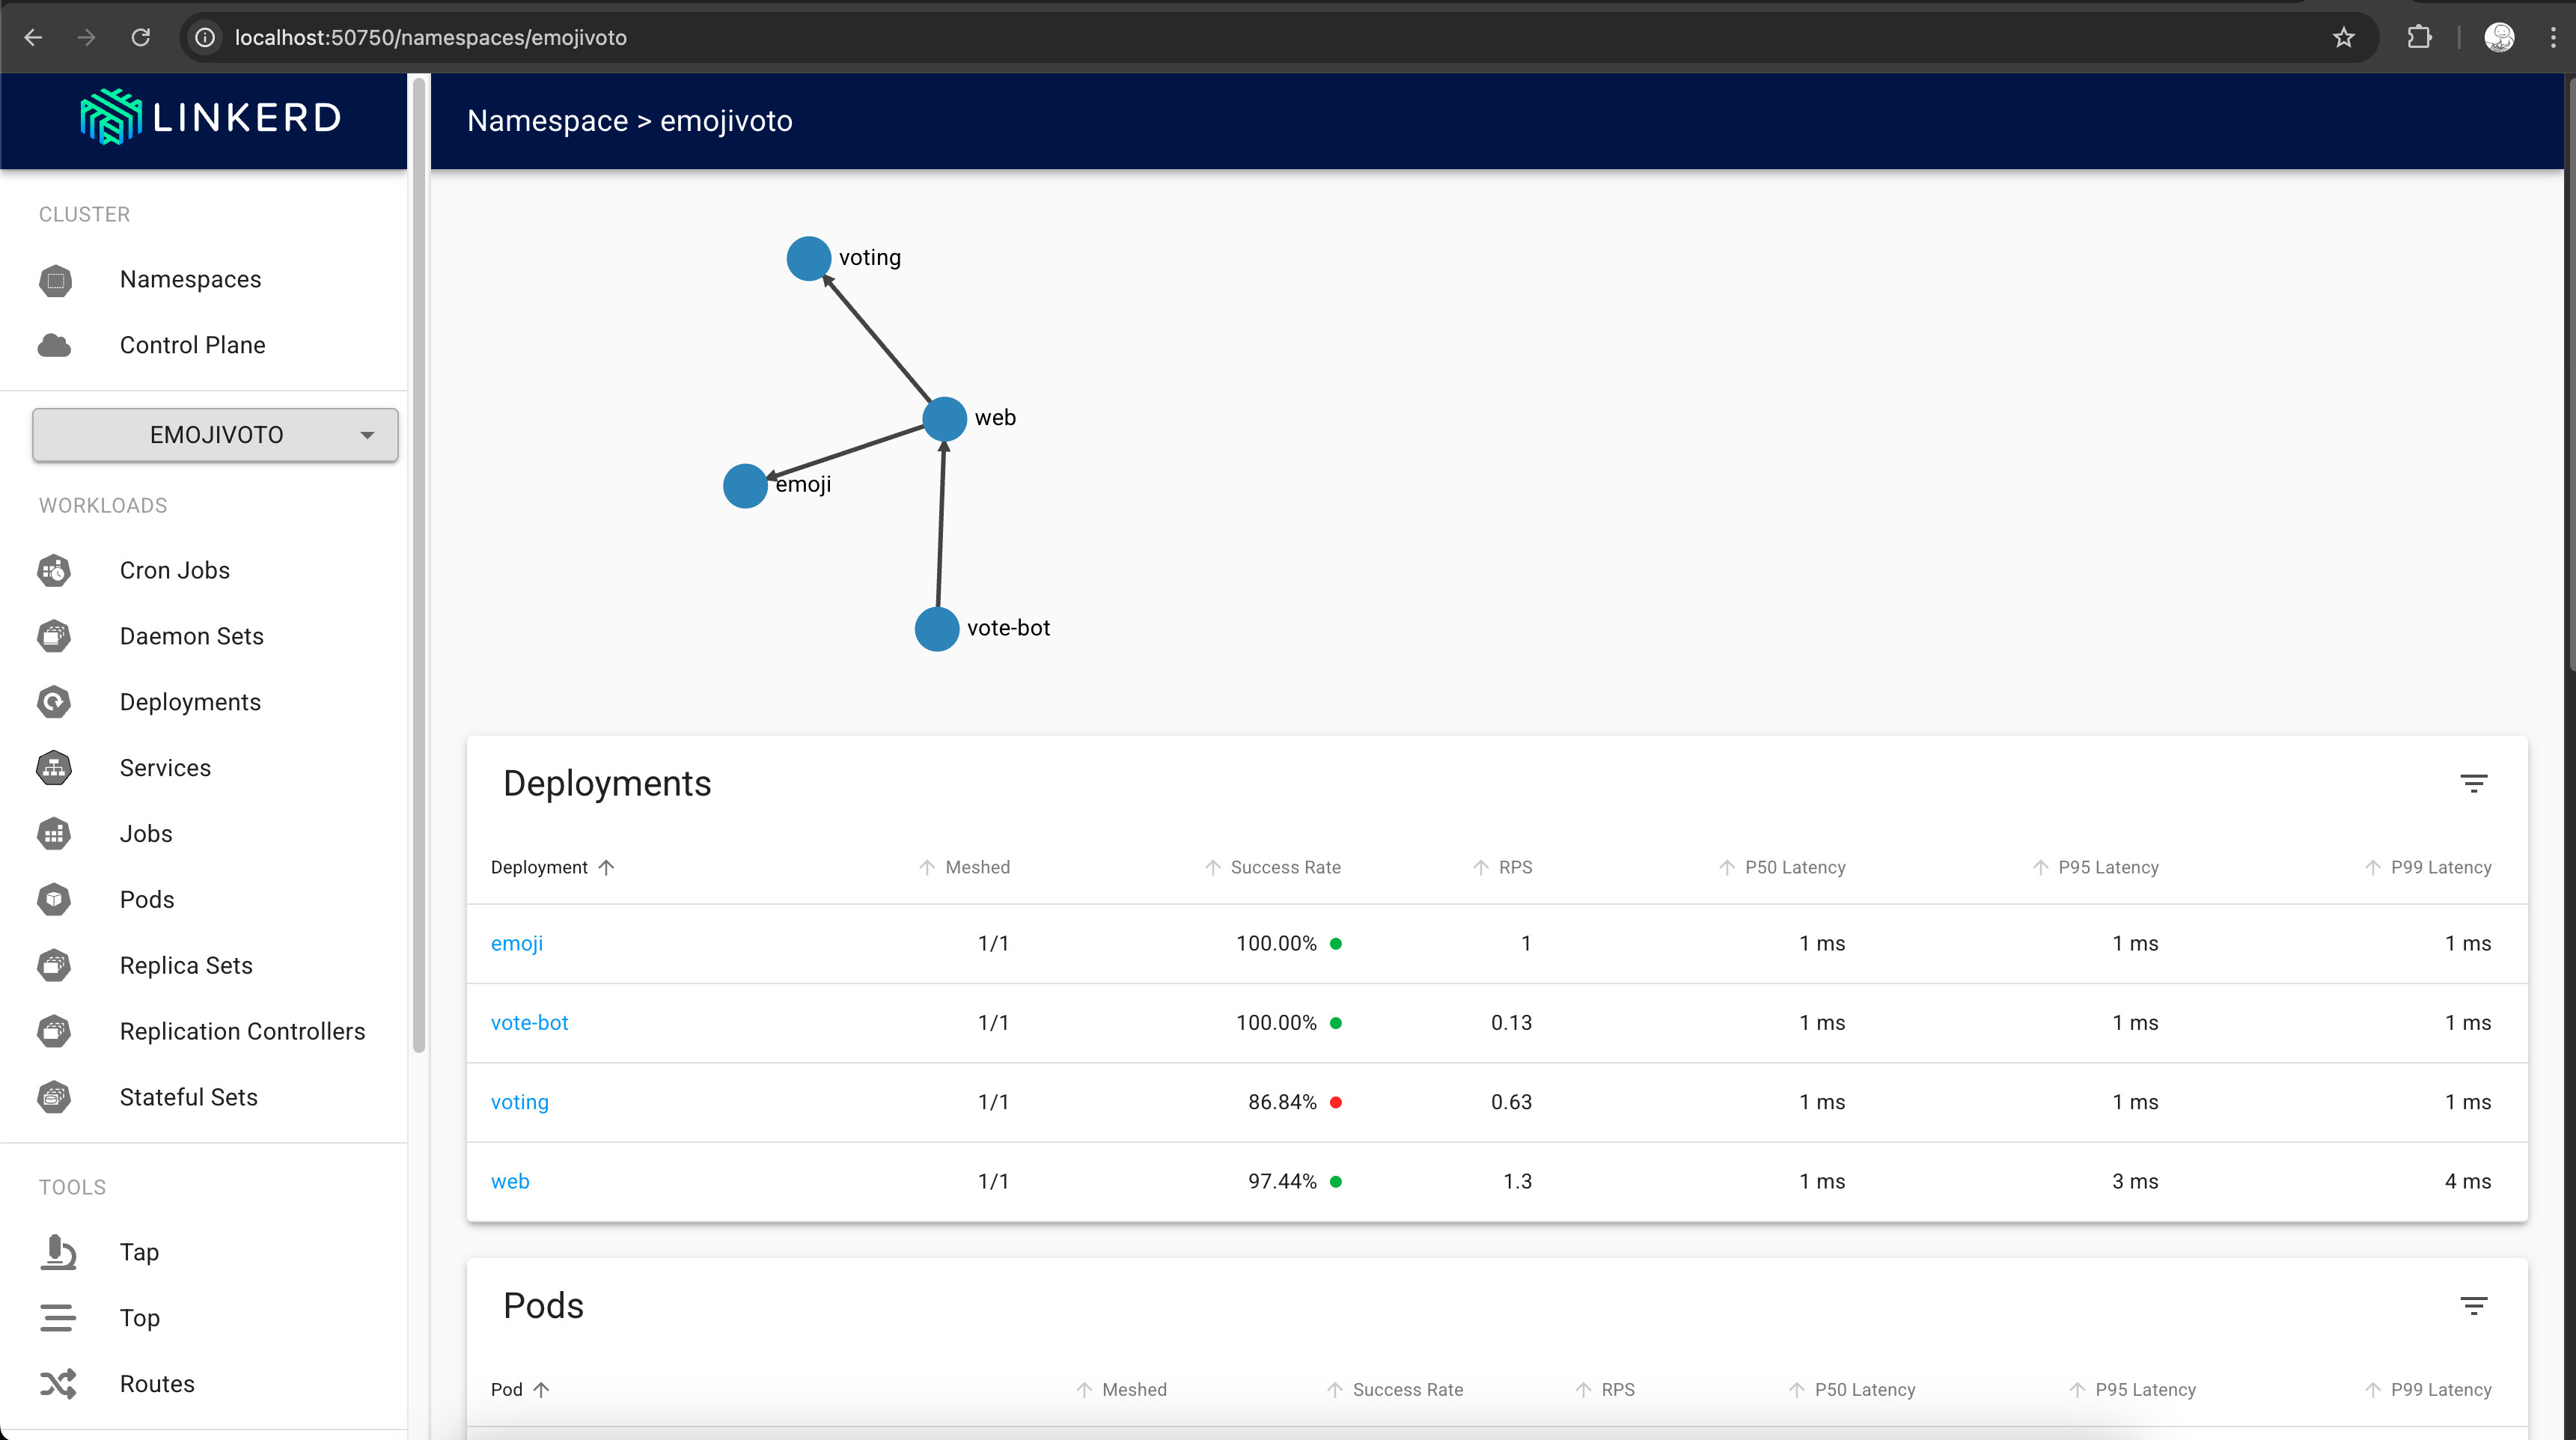
$ kubectl get pods -n emojivoto NAME READY STATUS RESTARTS AGE emoji-894859469-w9dvw 1/1 Running 0 22s vote-bot-57d8c8bb44-j6f6d 1/1 Running 0 22s voting-6487586c64-wzrcm 1/1 Running 0 22s web-f68fdff7b-8rdwd 1/1 Running 0 22s Now, if we access the Linkerd dashboard, we should see the demo application in the dashboard and since it is meshed, we should see the traffic flowing through the application:
Posted on 19/03/2025